

Whoever deals with the textile area on a daily basis, whether in the production of clothing or footwear or in the production of various accessories, knows that buttons constantly need to be replaced, some are lost, others are left over…
A button is a physical or virtual component designed to perform an action when pressed. In its physical form, a button can be a small round object, usually with a smooth or textured surface, that is pressed to actuate a mechanism, such as an electrical switch, lock, release mechanism, and so on. In its virtual form, a button can be an image or icon on a computer screen or mobile device that is triggered by being tapped or clicked with a mouse. Virtual buttons are widely used in application, website, and operating system user interfaces to allow users to perform actions such as submitting a form, performing a task, or navigating a page.
How many of us find ourselves keeping those buttons we found on the street, or that were left over or came in a piece of clothing we bought.
So, to help you enjoy and give a new life to them, Adifafe shows you some craft items that you can make today, giving a new use to the buttons you have at home.
Check out our suggestions.
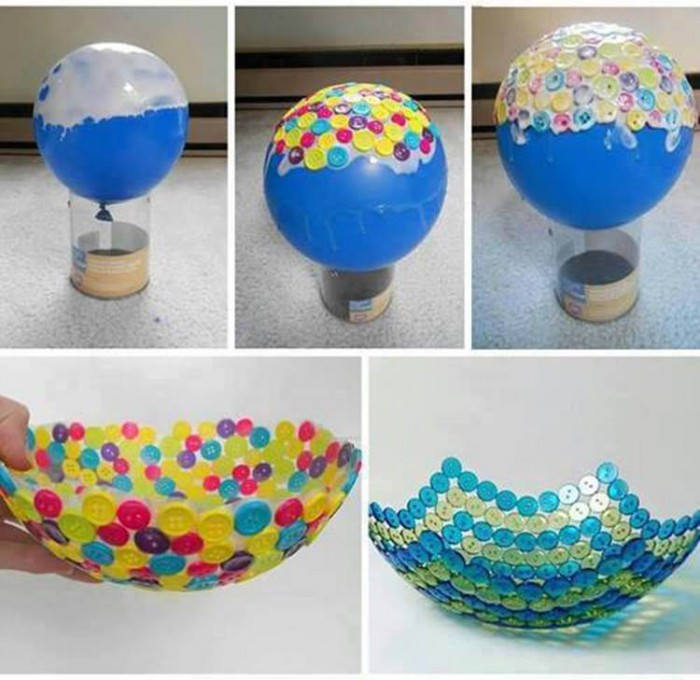
Button Cup
Materials:
- Liquid glue
- Rubber Balloon
- Colored buttons or the desired color
How to:
- Inflate the balloon and close it, placing the liquid glue on the top and round part of the balloon.
- Place the buttons, making the shape of the cup as you want and placing the glue over the buttons again.
- Let it dry for about a day or so, then puncture the balloon and remove any remaining rubber left in the cup.
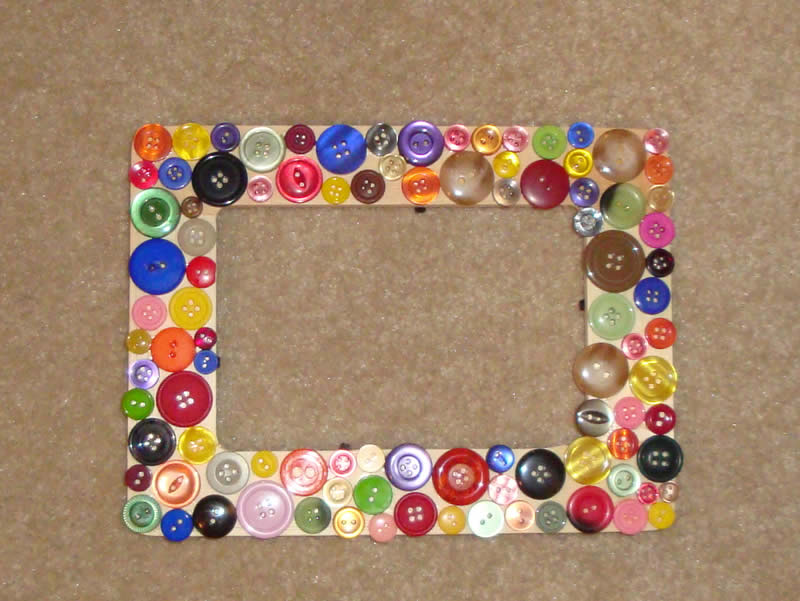
Picture frame
Materials:
- Antique frame
- Hot Glue
- Colorful buttons of various shapes
How to:
- Randomly place the glue-soaked buttons on top of the frame, brushing the end with more glue.
- Let it dry for about a day.
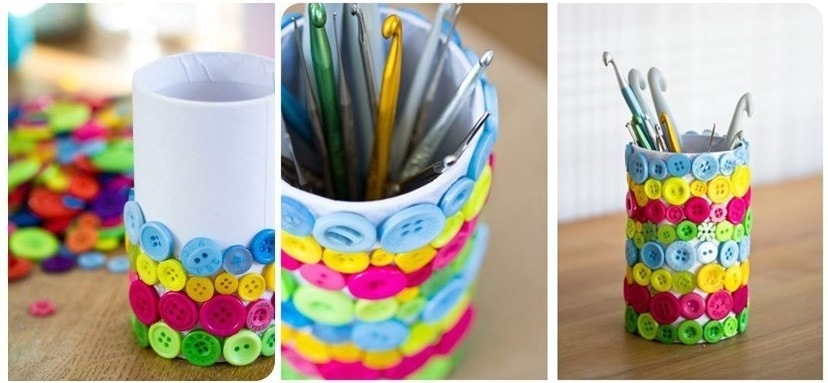
Pencil holder
Materials:
- Empty potato tin (eg small Pringles container) or canned pulses
- Glue stick
- Buttons
- Sulphite Sheets
- Hot glue
How to:
- Cover the outside of the can with glue-brushed bond paper.
- Cover on the inside as well if you wish.
- With the help of hot glue, glue the buttons around the can to your liking, brushing the end with a little more glue.
- Let it dry for about a day and you’ll have a cute and fun pencil holder for kids.
Now that you know how to give a new color to your life, taking advantage of things you have at home and giving your home a more lively and colorful look, we are sure that there will be no more button at home!